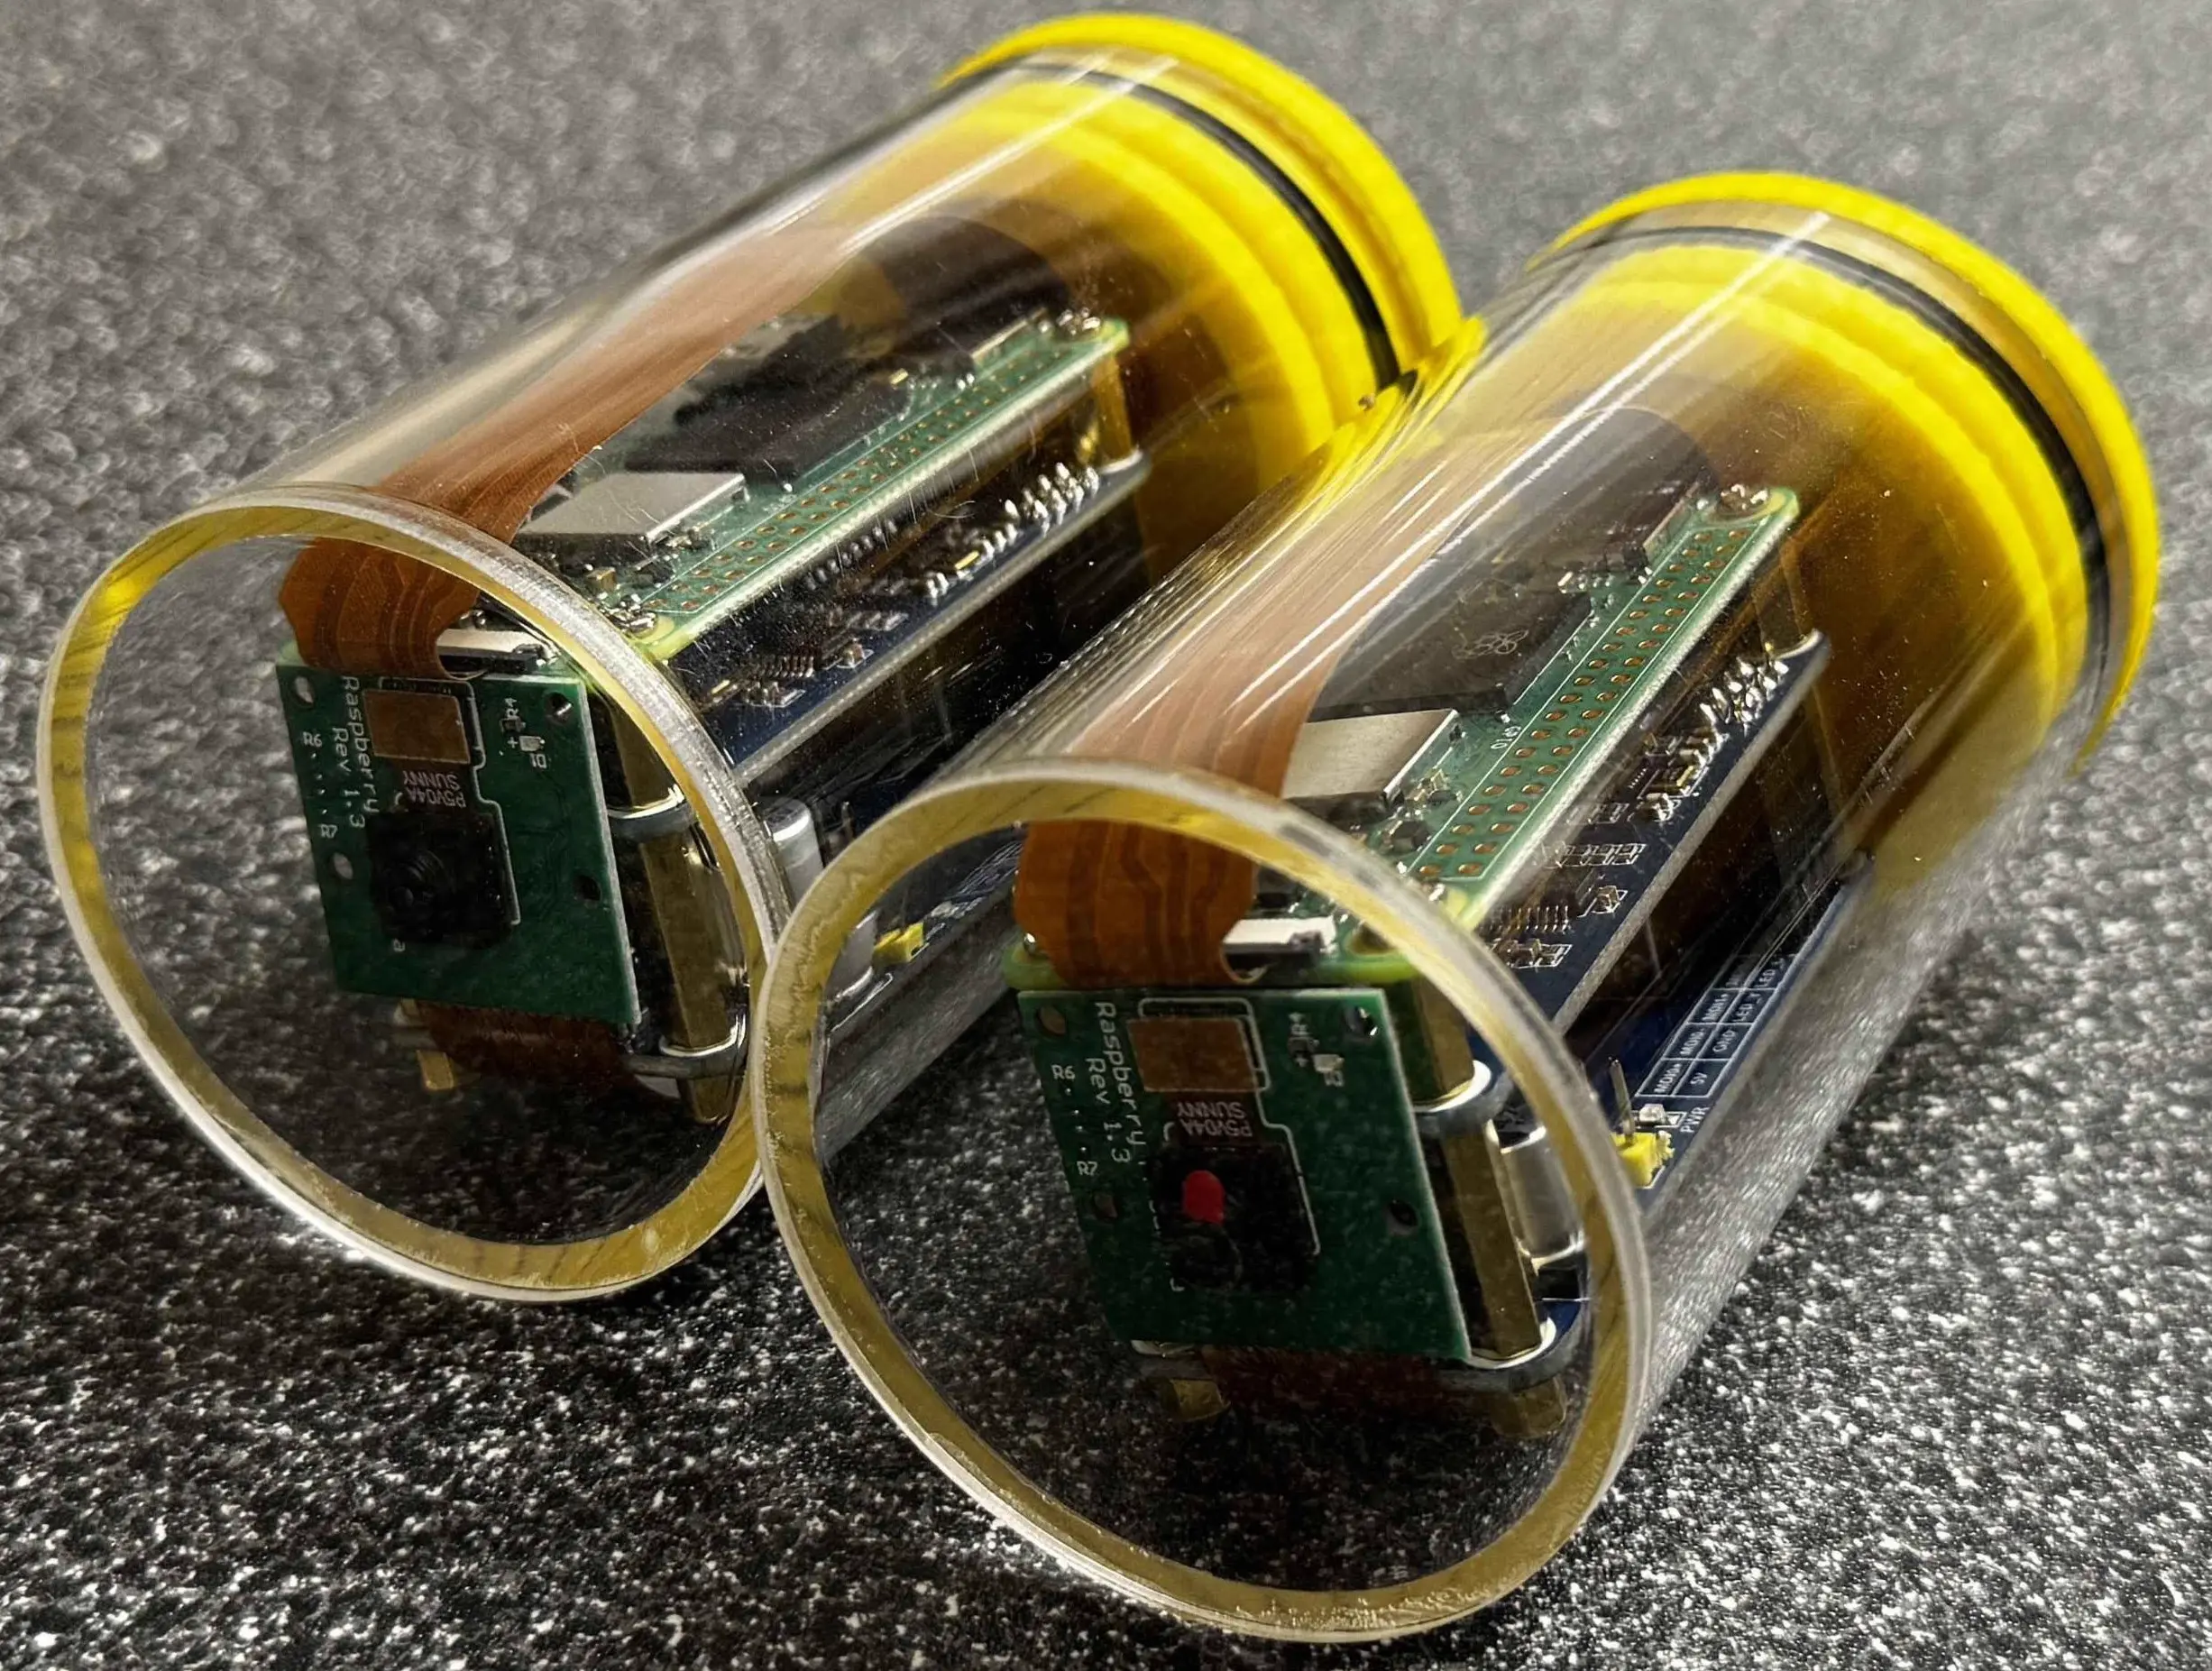
Note: Writing in progress….
Introduction
During my Freshman year (2023 to 2024), I joined my previous university’s IEEE club, which hosts several student projects. One of the most ambitious projects was the underwater robotics team, which participates each year in the MATE ROVs Explorer Class. Although we all worked together, my task was to develop 3 waterproof networked camera modules for the pilot. With the clock already ticking, I had to quickly get the subsystem working with the robot in time for the competition. I will be sharing my design, along with the challenges I faced and how I overcame them using the resources I had available.
About the compition
The best way I can describe the MATE ROV compition is like FRC but… in a pool. Diffrent robotics teams work together to build a remotely operated underwater vehicle, hence the name ROV, and compleat a set of diffrent tasks for points. Due to the fact that we are submerged at least 10 feet in a pool, waterproofing is a forefront challenge. On top of this, the ROV pilot can’t directly look into the water without penality. This makes having a relable video stream with as little latency to the pilot critical. Without it you may as well be blindfolded.
Physical Design
Because this post focuses on cameras, there are many missing details on how the entire robot was designed and implmented.
Step one was coming up with a solid design for the camera module and its housing. If any water leaks into the electronic enclosures it’s an immediate game over. Before the housing is constructed the electronics must be suited for the task at hand. The pilot needed several different camera angles mounted around the robot to help steer the ROV and manipulate The Gripper
The Brains
For the brains of the camera I chose the raspberry pi zero 2w for its compact form factor and ARM Cortex-A53 clocked at 1GHz.
The pi zero also supports h.264 video compression which helps reduce the bandwidth.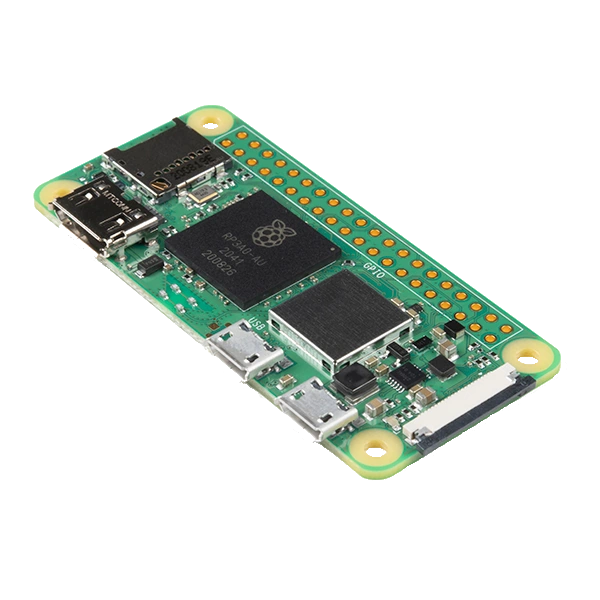
The second reason the pi zero was chosen was due to it’s wide adoption and Linux support. There are many, probably faster, SBC in this formfactor our there. But, I didn’t want run into problems with unsupported distributions with ROS being a requirement. Regardless, dead ends were hit anyway.
The Camera
For the cameras I used the Raspberry Pi Zero Camera Rev 1.3 which makes use of a 5MP OV5647 image sensor. When I was was choosing a camera module I noticed that almots all the image senors on the Raspberry camera modules use rolling shutter which, at the time, made me a little nervous.
bottleneck forshadows
Cameras with a rolling shutter capture an image one row of pixels at a time.
which when acclerating can cause distortion, which might make it harder for the pilot to operate.
Data and Power
With a camera and computer now chosen I had to find a way to power and communicate with them and send a video stream back to the pilot. The ROV had an onboard router which briged the cameras to the pilot through The ROV’s Tether. The switch also routed data to the onboard computer as well as the cameras (not in image).
The first thing that comes to mind when I hear power and data is Power over Ethernet (PoE) which would allow us to power the cameras with the same power supply as the network switch they are attached to.
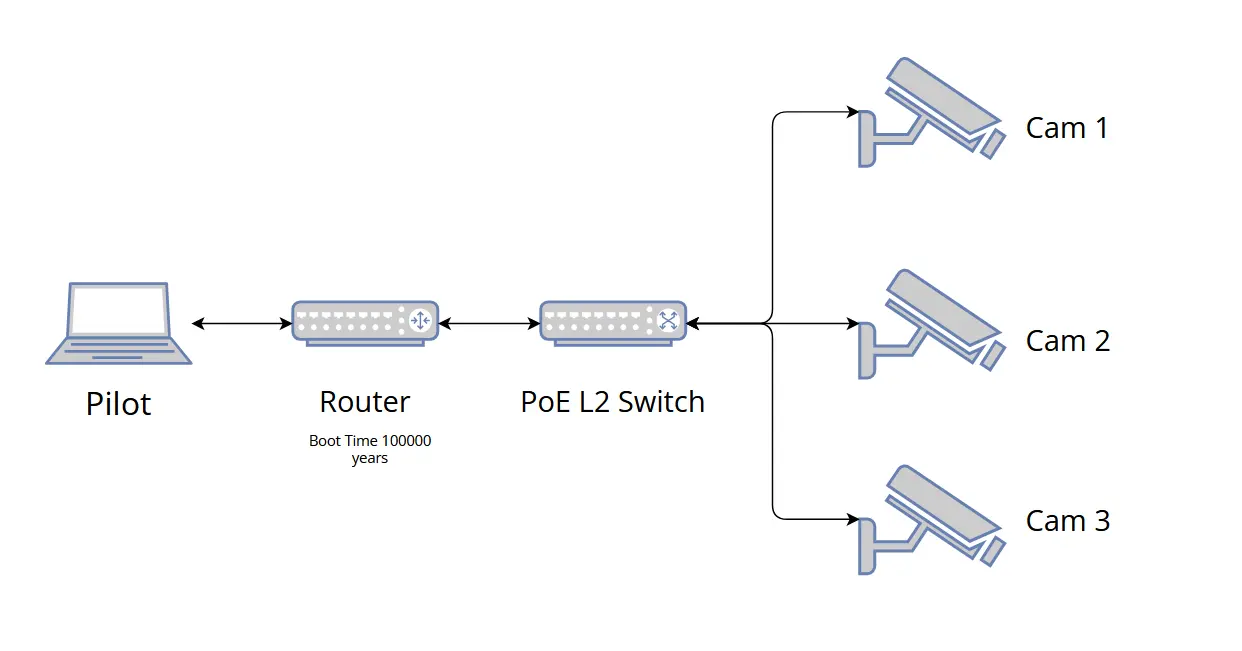
ROV’s camera network toplogy
Each camera then only needs one cable for both power and data. The raspberrypi zero dose not have native supprt for Ethernet or PoE, but this be sloved using the waveshare PoE USB hat.
After putting together the camera and Waveshare HAT I ended up with the brick of electronics you see below.
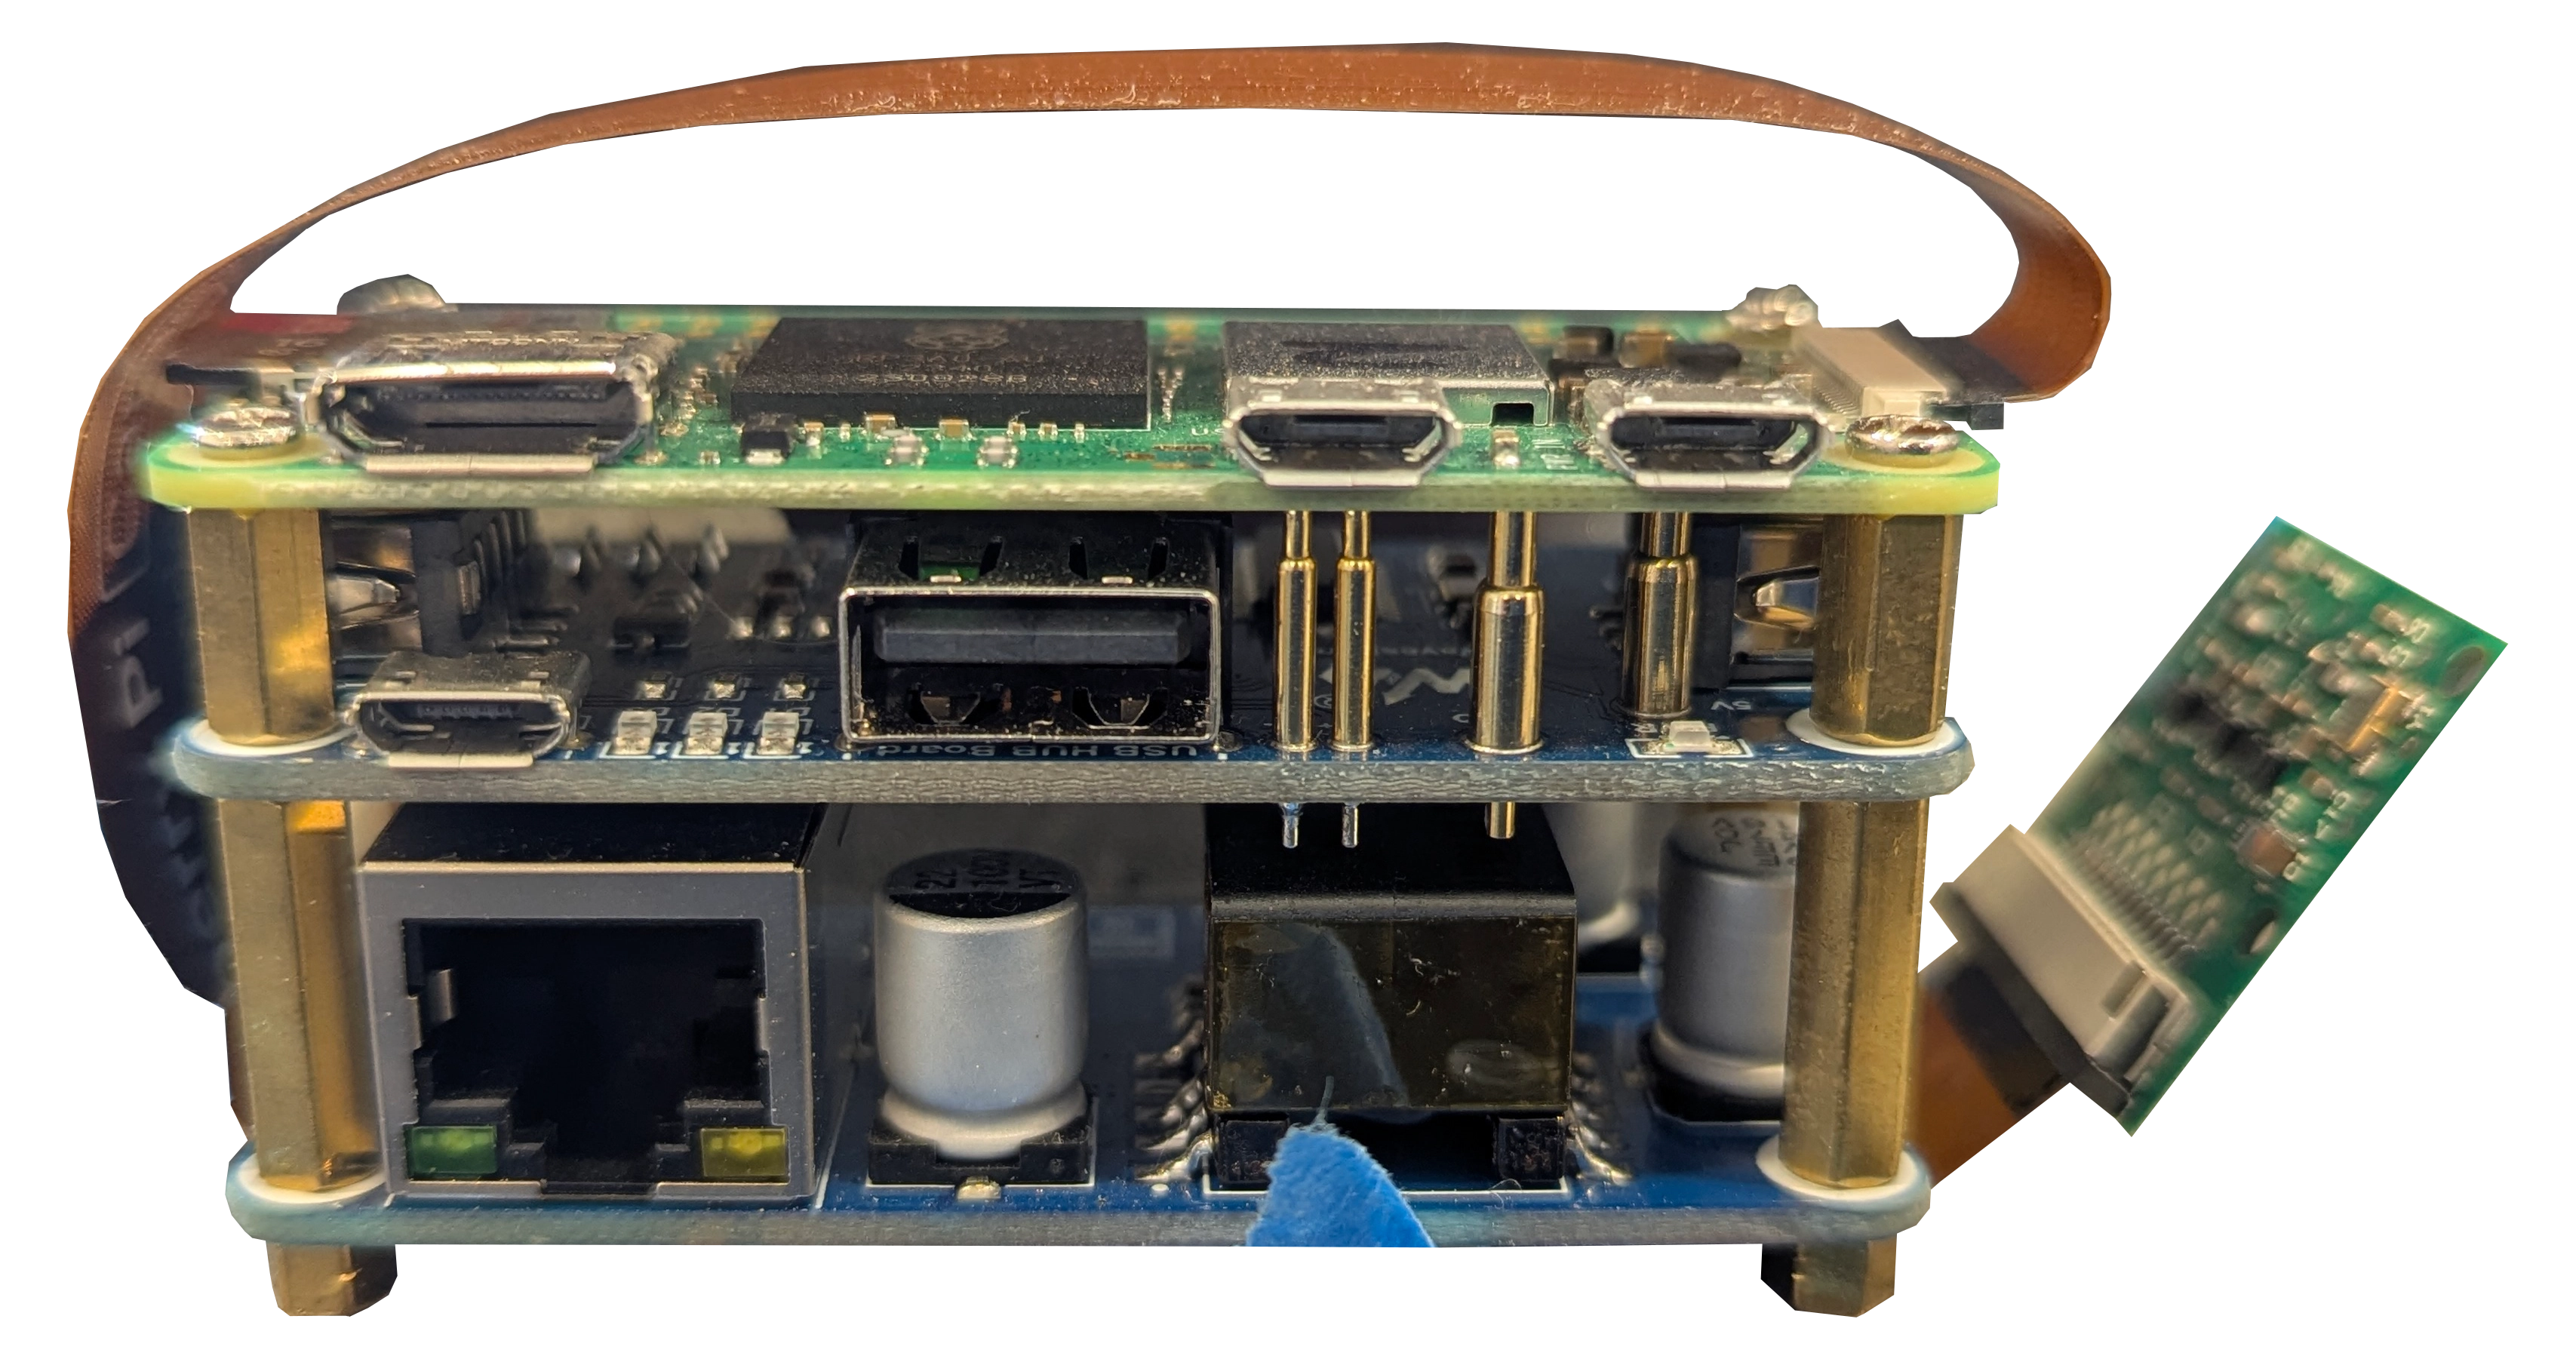
Raspberry pi camera module
Waterproof Enclouser
If any water leeks into the electronic enclousers it’s an immediate game over. I had to come up with a design that would ensure water woulden’t sneek its way in, and find a way to get power and data to the camera.
If this enclouser was a real product it would have an Ingress Protection code of at least IP68. The second digit in the code indicates how well the enclouser prevents the ingress of water, and at the level of 8 requires full submersion in water at a depth of 1 meater (~3.2ft).
Students from prevoius compitions used a waterproof project box with a clear lid that housed a Raspberry PI Camera setup. But, with a new ROV frame, and needing to mount the camera on the gripper we needed something more compact. The Raspberry Pi Zero 2 W was the best contender, as it is far more compact and fit withen our budgett and timeline (more on this later).
The next task was getting power and data transfer to each of the three pi’s.
Now, I do have to preface that this idea was inspired by another robotics teams design, but with major changes. I unforunatlly do not remember what team I had spoken to about there design, but I do remember that they were also using a PI zero in there design.
Software
Writing in progress….
Battling ROS
Writing in progress….
FFmpeg
Writing in progress….
Other Chalanges
Writing in progress….